
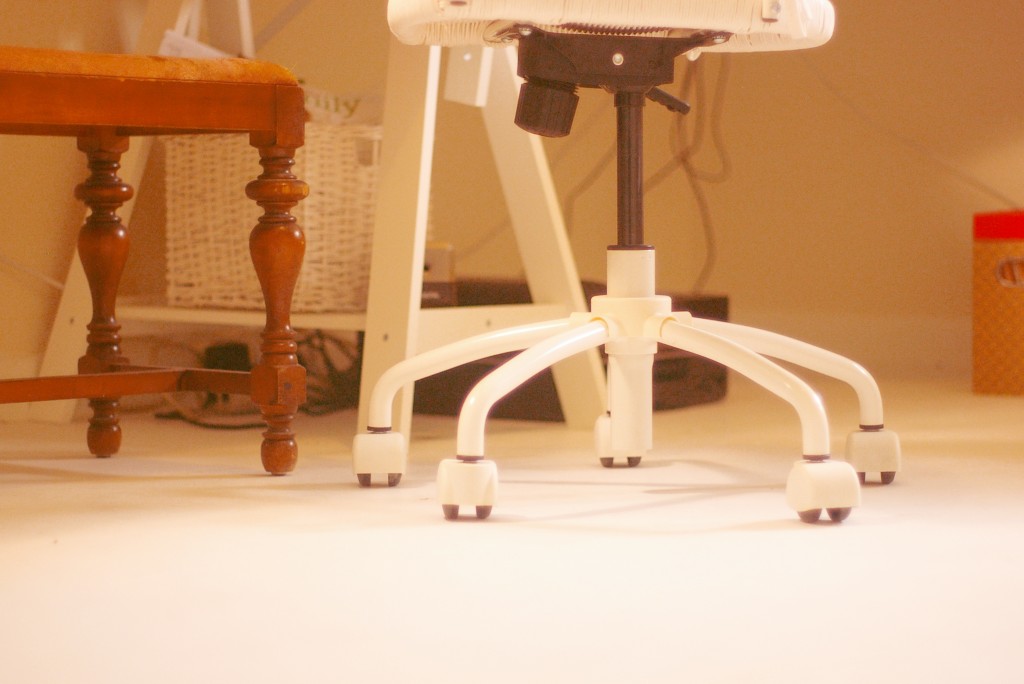
The last time we met in the studio, we were repainting the walls and floor. You can see here what the studio looked like before. It wasn't very lovely, and doesn't show the grotesque carpet we removed. But since then, it's a new place. We'll start with the floor. Isn't it so pretty?
So, for the art studio, we didn't want carpet. And since we were needing to remove it anyways, we looked at other hard floor options (so much easier to clean than carpet with all the art making going on!). I love white floors, so we looked at this option and I dreamily considered this option. But they each came with a steep price tag ($350 for installed laminate and at least triple for hardwood) and with the cement floor underneath (this room is in the basement) we thought, "Why not just paint the cement floors white?" So we did. And I am in love.....with my floors AND my husband since he did all the work. And it cost so much less (money, not time that is!).
How to Paint a cement floor
MATERIALS:
1. To rip up existing floor, if there is one: crowbar, hammer, pliers, razor, etc.
2. To get the surface ready: Mop, rags, etching solution, concrete patch, trowel, sand paper, vacuum (shop vac, or good home vacuum with attachment pieces), oil remover (if necessary), concrete sealant and primer.
3. To paint: 1 part Epoxy paint, good synthetic paint brush, roller with a good long handle.
STEP-BY-STEP PROCESS:
1. Rip up the existing flooring. Make sure to be meticulous about removing all nails, staples, and remnants from the cement. There will most likely be damage when you remove anything nailed or stuck to the floor, but that can be fixed later. Better not to hurt the floor, but carpet glue and floor boards can be nasty to get up, and can do a bit of damage.
2. Clean up any stains from oil or glue. Oil stains will show through the paint, and will eventually cause damage. So get rid of any oil stains first, being careful to allow plenty of time to dry and treat. Here is a great link with options for cleaning up oil stains.
3. Scrape off any unwanted surface material. We had large amounts of carpet glue that we had to scrape and scrub. Give yourself plenty of time to take care of this! It's super important if you want crisp and beautiful floors!
4. Fill any holes with concrete patch. Using a trowel, patch up any gouges or holes and allow time to dry. Sand down and refill if necessary to get your floor smooth and even.
5. Clean the floor with a vacuum and mop to remove all dust and dirt, and wipe up with a wet rag or mop. Allow plenty of time to dry (at least 24 hours). The floor has to be completely dry to paint. To check for any moisture, place a piece of plastic wrap on the floor, and weigh it down with something heavy. Let it sit overnight, and if there is any condensation on the plastic, you know you need more time. Give your room ventilation and a fan to speed up the process.
6.Tape off the floor by placing painters tape along the edges of the baseboards just where it meets the floor.
7.Treat the floor with an etching solution. This is possibly optional, but we read so many tutorials and never got a consistent answer about this step. The etching process treats the cement so that it can take the paint properly. We decided not to skip this step since we really didn't want to be doing this floor over again. It's not that hard. Just wipe the floor with the solution, and then make sure to wipe it up/vacuum it up according to the directions on the bottle. Allow time to dry.
8. Prime the surface of the concrete. We used this concrete primer and it worked great. Again, allow time to dry anywhere from 4-24 hours.
9. Paint the floor. This is the fun part! We used this paint with a white finish, but I suggest going to your local hardware store and finding what you need and talking with someone you can trust as you gather your materials. You can paint this just like you paint a wall: cutting the edges in first with a brush, and then rolling the paint on the main surfaces. Make sure to get a long handle to your roller, or you'll break your back! We used a 1 part epoxy because we were told that a 2 part epoxy has really toxic fumes, and needed proper ventilation, which with one window and because it was in the basement, we went with the 1 part epoxy paint. The difference is in the sheen, and how hard the surface is. Allow 24 hours for it to dry between coats.
10. Repaint as many times as needed. We painted 3 coats, and it looks perfect!
11. We didn't put a finish on the floor but I am told you can. We kept this a more matte finish with less sheen, but it cleans up really well! I love it!
Total Cost:$80
Concrete Patch: $10
Etch: $20
Primer: $25
Epoxy Sealer Paint $25
You can't beat 80 bucks on brand-new mess free floors! But be warned: It look a lot of TIME. Each process needs plenty of time to dry. I think the whole process took about a week of evenings. My husband is the greatest...Let me tell you!
Stay tuned to see the walls and more....I am cranking through my illustrations so there is nothing on the walls yet. Decorating will have to wait a few more days. But I am very much enjoying the space. White floors.....yummy.